
Do you want to create a group email in outlook?
Well, it’s essential for every professional Outlook user when he plans to send a mass email to a group of recipients. A group email helps every email user to send a single email to multiple recipients in one go rather than going for a tedious copy-paste activity.
There are almost 400 million email users who actively rely upon Outlook as their primary email medium and they face this problem very frequently.
In this article, we will explain two methods for you to know how to create a group email in Outlook that increases your efficiency and productivity.
What is Group Emailing?
Group Emailing is sending multiple emails to a specific group of people. You can create group email in Outlook and then use the same to send emails to groups of people together. If you are someone who wants to be regularly in touch with people and don’t want to add each member every time, Group email is what you need. You can create a contact list and then add recipients to the same.
How To Create A Group Email In Outlook: The Professional Method
Mostly this is a progressive method used by Sales Professionals, Marketers, Recruiters, and other Business Professionals to create group email in Outlook. If you are also looking for a fruitful and high yielding email campaign technique to send multiple emails, you should opt-in for it.
With tools like Saleshandy, you can simply add your contact lists and send group email in outlook. On top of that, you can schedule your emails, create auto follow-ups, and use personalization techniques to give a more human touch to your emails. Along with this, you can also know your customer behavior by tracking their link clicks, replies, and open rates.
Simple Steps to Create An Email Group In Outlook
Here we will show you how to create a group email in Outlook in two parts.
In Part 1 we will make a contact list of recipients and in Part 2, the process of sending group emails in professional way.
Part 1: Creating a CSV file and export
If you are using group email in Outlook, you need to make a CSV file of your contacts. Follow the below steps to do the same.
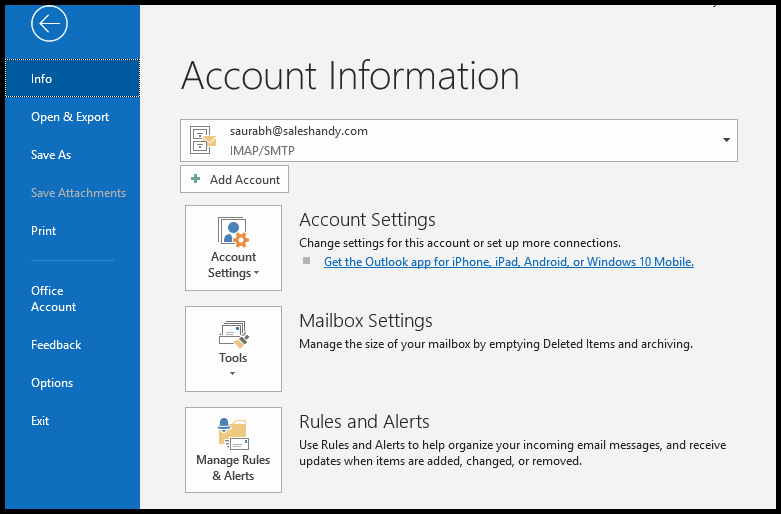
Step 1: Click on “File” in Outlook
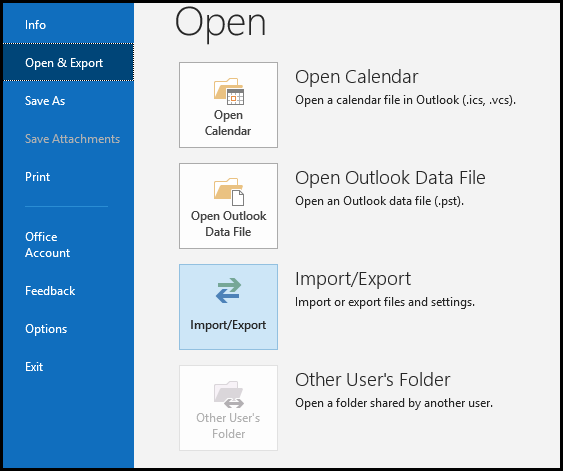
Step 2: Click on “Open & Export” then select “Import & Export”
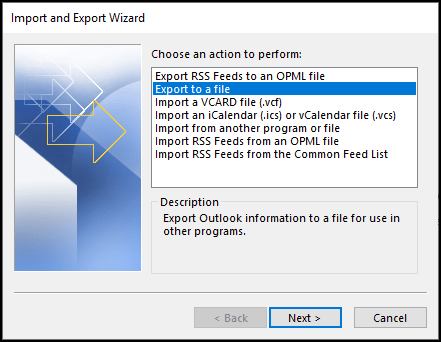
Step 3: Click on “Export to a file”
Step 4: Click on “Comma Separated Value” and then “Next”
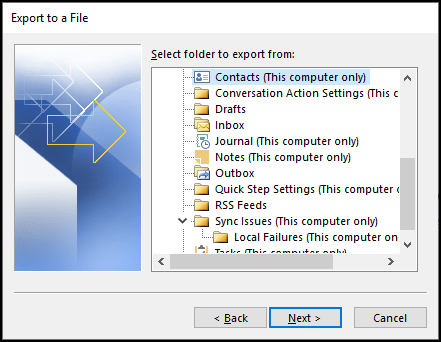
Step 5: Click on “Contacts” and click “Next”
Now, let’s see every step in detail.
Step 2- Choose Open & Export >> Import/Export
Step 3- Click on Export to a file and Select Next
Step 4- Select Comma Separated Values and hit Next

Step 5- Click on Contacts and select the folder where you want to export it. Click Next to proceed
Step 6- Name the File and click Save. Your Outlook contacts will be saved as a CSV file in your system

Part 2: Sending Email Campaign
After creating a CSV file of all our contacts, now let us learn how to send a group email campaign with outlook in the below steps.
Step 1: Create an account with Saleshandy
Step 2: Click on “New campaign”
Step 5: Compose email for campaign
Now, let’s have a deeper look into every step.
Step 1- Sign up with Saleshandy
- To create a group email in outlook, you first need to SignUp with Saleshandy using your outlook account.
- Once you Log In, you will be directed to the Saleshandy Dashboard
Step 2- Creating Campaign
- Use the Email Campaign option from the Dashboard and click on New Campaign

Step-3 Contact List
- Import the CSV file that you created in Part 1
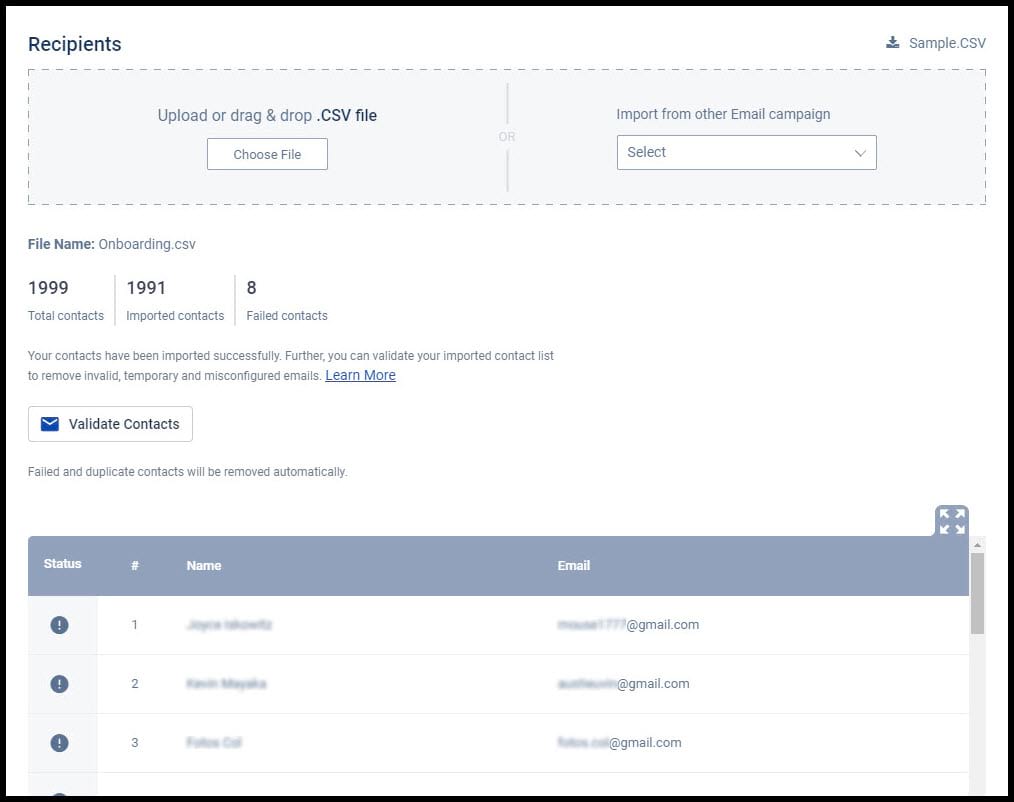
Pro-Tip: If you want to run a campaign targeting the recipients from one of your previous campaigns, you do not have to upload a different CSV file for that.
Step-4 Select account
- This is for users who have multiple accounts. You can select your Outlook account from the options

Step-5 Compose Email Campaign
- Use a perfect subject line and draft your Email body
- You can also select Merge Tags to give your recipients a more personalized touch
- Choose from multiple Merge tags like First Name, Company and number as per your imported contact list.
- Add an unsubscribe link.

Step-6 Automatic FollowUp
- Once you send the initial email, it’s important to follow up
- Saleshandy lets you set up to 9 Followup stages and you can choose the condition as per your recipient’s activities. The activities are mentioned below
- Not opened– An auto follow up email will be sent to those recipients who did not open your previous email
- Not Replied- People who open your email but did not respond, they will get follow up email
- Been sent- This is the condition where an auto follow-up email will be sent to all the valid recipients from the list irrespective of Reply or Open Count
Step-7 Test your Campaign
- You don’t want all your hard work go in vain. So test the email campaign before sending it out
- Click on the test Email Option and type in the Email address you want to receive the test email

Step-8 Schedule Campaign
- Schedule your Email as per your preference
- You can select the time you think the maximum of your users will open the email
- You can choose from 240 different Time Zones
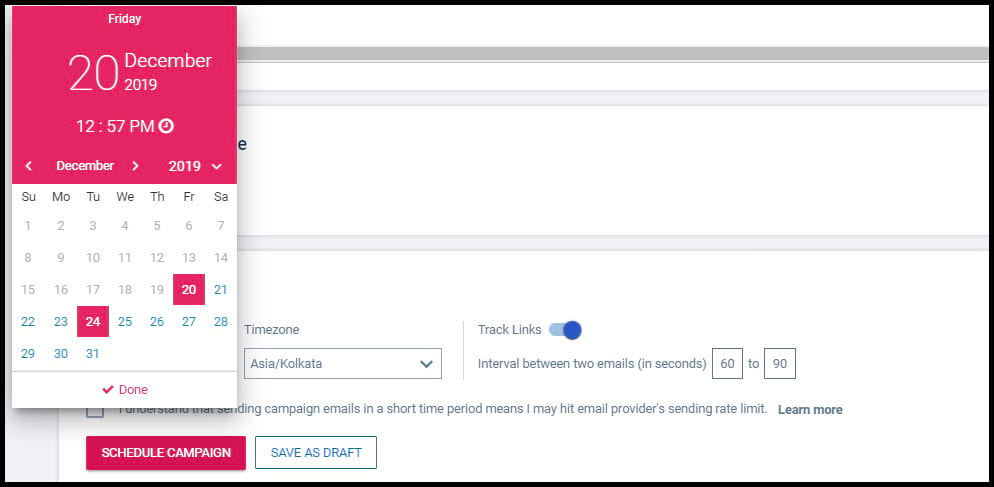
Once you do this, click on “Schedule Campaign” and relax. Your emails will be sent to your recipients on the scheduled time.
Why Create a Group Email in Outlook with Professional Method – Advantages
- It will save a lot of your time where you don’t have to add each recipient individually
- You can also track your recipient’s behavior by his open rates and reply rates
- Automatic email follow-ups are powerful. They will give a boost to your email campaigns and productivity
- You can schedule an email with a click. Select the schedule now and send an email whenever you want.
SalesHandy has a unique feature where you can block a specific Domain whenever you send an email campaign without affecting your list.
Cons of Using a Professional Method
- Every time you want to send a group email, you will have to open the web application instead of the native Outlook app. However, with minimum hustle, you can get a lot of features and increase your efficiency.
How To Create A Group In Outlook By Traditional Method
Here we will show you the process in two parts. In the first part, we will show how to create a group email list in outlook where you can create your email contact list and in the later part you will know how to send group email using outlook.
Part 1: Creating a group email list in outlook.
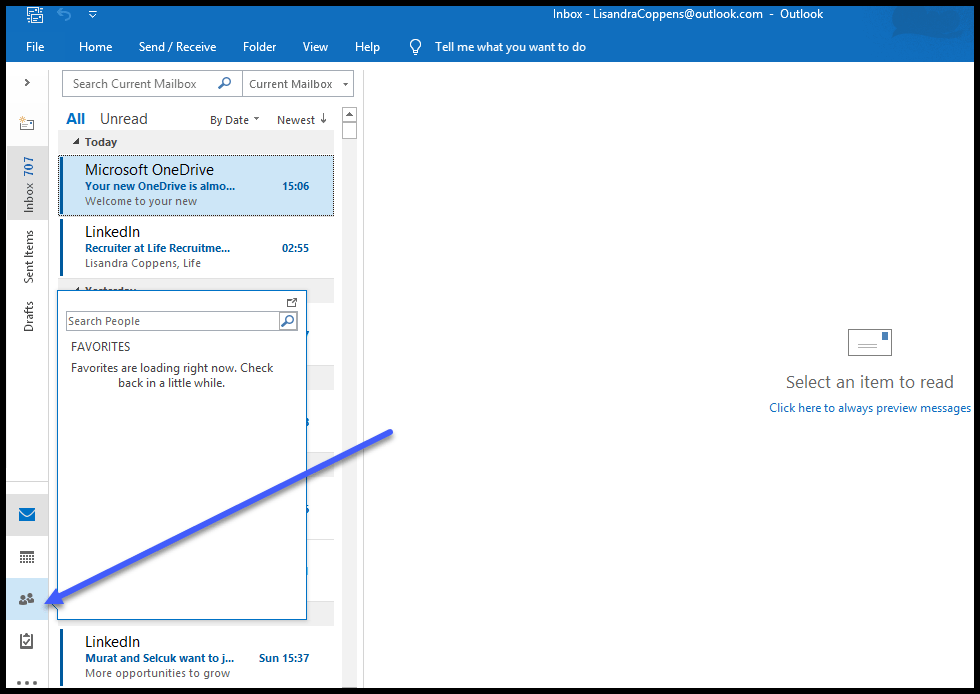
- Step 1- Prepare Contact List: Once you are logged into your Outlook account, go to the Navigation Bar and click on People
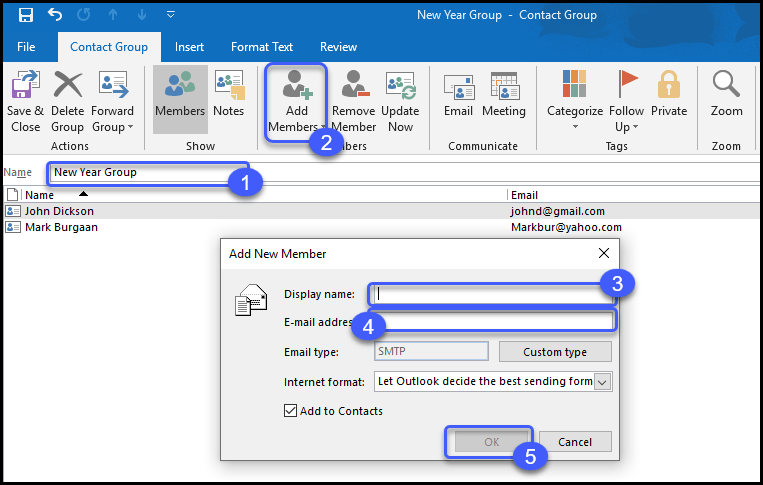
Step 2: Make a Group
- Under Contacts, you will see New Group

1) Name your group
2) Add members in the list
3) Write the name of your member you are adding
4) Mention email address of recipients
5) Click on OK and your group list is prepared
Part 2: How to send a group email using outlook
- Now when you compose a New Email, mention the name of the group that you have created
- Outlook will add all the members in that group as the Recipients of your group Email
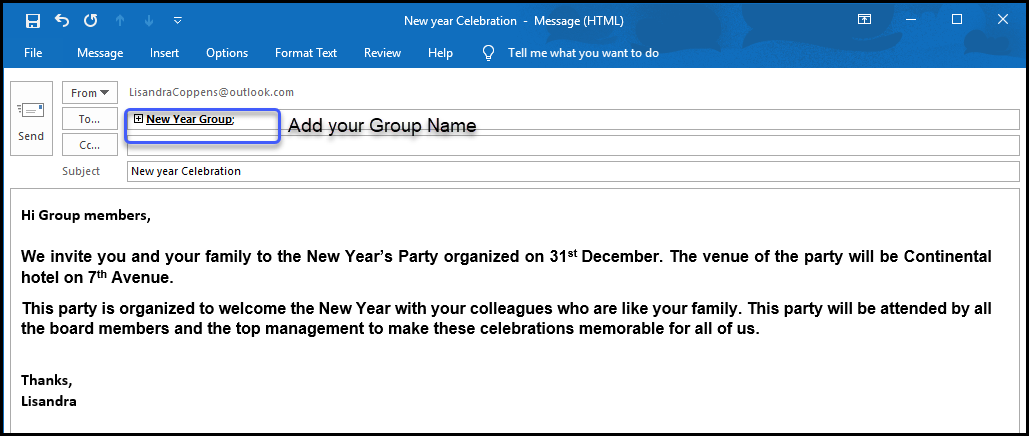
- Click on Send and your email will be sent to all the members of the group
Note: If you are using any different version of Outlook, the basic steps we have written will be the same.
Pros To Create A Group Email In Outlook Using Traditional Method
- People who want to send Emails every day for free, this works best for them
- You don’t have to add email addresses every time you send an email to the same group of people
- Reaching out to multiple people becomes very easy
Cons Of Creating A Group Email In Outlook By Traditional Method
- All the recipients will get a notification when you create a group in Outlook
- Recipients can see the email addresses of other group members to whom you have sent the group email. This might create a privacy issue.
- You do not get any customer data which becomes very important in understanding the recipient behavior at times
- No auto follow-up feature is available if you send group emails in Outlook. You will have to send an email reply to each recipient individually
- You cannot send a test email and check if the email is reaching out correctly to the members
- You will be unaware if someone replies you If you are offline and no real-time notification will be sent
- If the user is using a different version of Outlook, the content may get hindered when it reaches the inbox of the recipient
Benefits of Creating a Mailing List in Outlook
- Group emailing is time-efficient
- Easily segregate your contacts based upon your use cases
- You can import and export this contact list whenever you want
- Prevent yourself from mixing your audience by making a list
- With all the groups right in front of you, you can prioritize which one to send an email
Final Takeaways
If you follow the right steps of creating a group in Outlook, it can be very useful in gaining potential customers. Be it an Enterprise client or Small and Medium-sized company, this feature of group email will definitely help. But once you send the campaign, your work doesn’t end there. You need to be proactive.
By using cloud-based automation tools like Saleshandy, you can always stand apart. You can set auto follow-up emails, and get a detailed report of your campaign. This will help you in understanding your customer behavior and improve your performance drastically.